Heat Exchanger Crack Detection & Furnace Safety
Ensure furnace safety with these professional techniques for crack detection. Prevent hazards and maintain efficiency while safeguarding your home environment.

The pilot light is the small, always‑on flame that lights your furnace’s main burners. When it misbehaves, your heat can stop — and safety can be affected. This guide walks you through what the pilot light does, the common reasons it goes out, and how to safely diagnose problems so you can decide whether a careful DIY fix is appropriate or if you should call a pro. You’ll learn the usual causes — thermocouple wear, a clogged pilot orifice, drafts, or gas supply/valve issues — plus step‑by‑step relighting instructions that put safety and carbon monoxide awareness first. We also cover flame‑color cues, signs of incomplete combustion, preventative maintenance, and what influences thermocouple replacement costs. Practical checklists and clear call‑for‑service criteria will help Phoenix and Sun City homeowners act with confidence.
If your pilot won’t stay lit, the problem usually lies with a sensing part, the fuel path, or airflow. Typical causes include a dirty or misaligned thermocouple, a blocked pilot orifice that chokes gas flow, drafts that blow the flame out, a failing gas valve that interrupts supply, or pressure/supply issues in the gas line. Knowing these causes helps you perform safe visual checks — like watching flame size and color or noting any gas odor — while keeping safety front and center. The short checklist below shows what to look at first and what to leave to a technician.
Quick homeowner checks to try before deeper troubleshooting:
Those checks help you decide whether to continue with safe troubleshooting or schedule a professional inspection.
The table below pairs common symptoms with likely faulty parts so you can match what you see to probable causes.
This quick reference helps translate simple observations into next steps — and reminds you that if you detect a gas smell, persistent yellow flame, or a CO alarm, you should evacuate and call a professional right away.
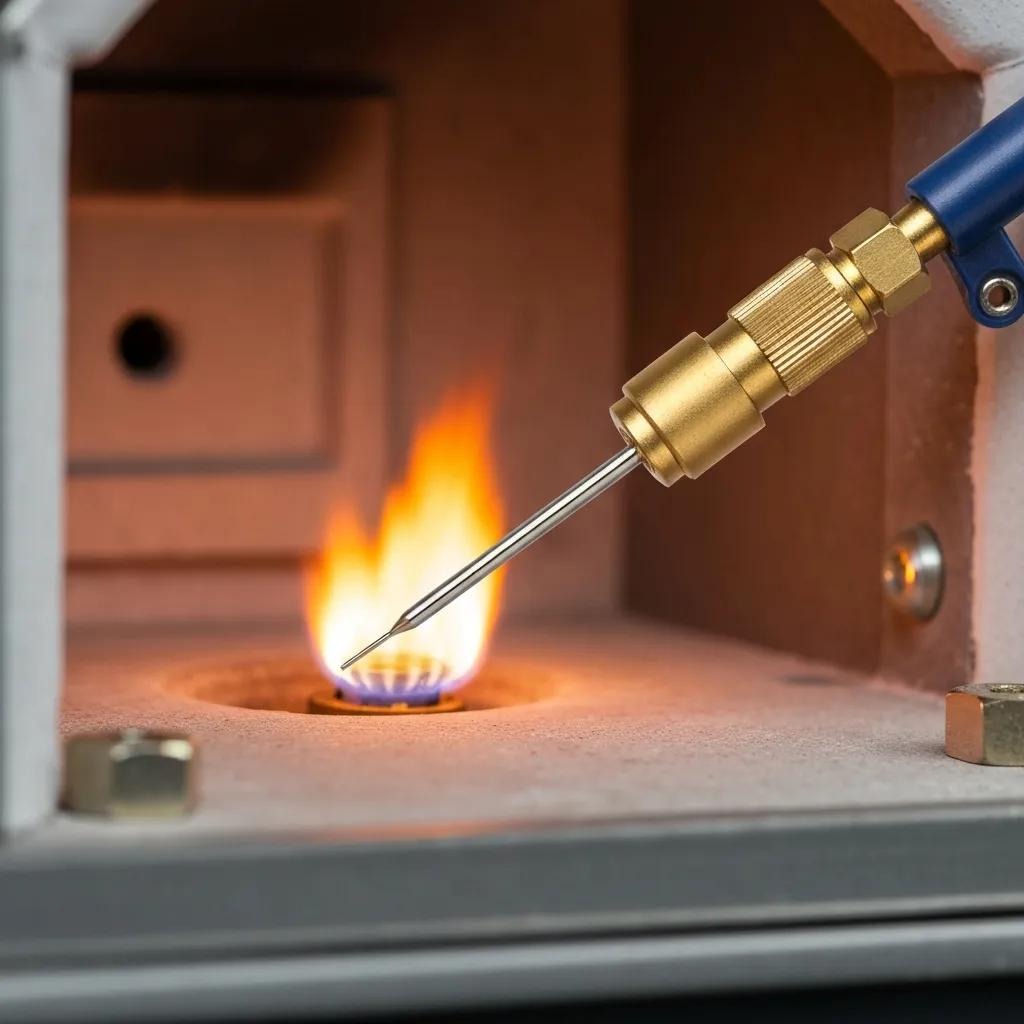
The thermocouple is a heat sensor that produces a small electrical signal while it’s in the flame; that signal tells the gas valve to stay open. If the thermocouple fails — from misalignment, soot or corrosion, mechanical wear, or an internal fault — the valve closes and the pilot goes out. A common homeowner sign is a pilot that stays lit only while you hold the control knob. You can safely check whether the thermocouple tip sits fully in the flame and look for heavy sooting or visible damage, but avoid bending or forcing parts. If cleaning and a safe realignment don’t fix the issue, replacing the thermocouple is usually the reliable professional solution.
That’s why a pilot that dies when the thermostat calls often points toward a sensing problem and why airflow and fuel checks are the next step.
Yes. Drafts and interruptions in gas supply are frequent causes of flickering or extinguished pilot lights — especially in homes with lots of door/window traffic or during seasonal pressure swings. A draft can cool the pilot assembly enough to drop the thermocouple voltage and shut the valve; low or intermittent gas pressure from the utility will produce a weak or nonexistent flame even with a clean pilot. Safe quick checks include looking at other gas appliances, sniffing for the rotten‑egg gas odor (and evacuating if you smell it), and checking for obvious drafts near the furnace. If you’re unsure or notice any odor, stop DIY steps and call a professional.
When conditions look safe, you can proceed with relighting — following the steps below carefully.
Relighting the pilot is straightforward when you follow the manufacturer’s procedure and confirm safety first. Before you start, make sure you do not smell gas, CO alarms are silent, and the area is ventilated. Check your furnace data plate or manual for model‑specific instructions. The numbered steps below are common to most gas furnaces and intended for homeowners who are comfortable following mechanical directions. If relighting fails repeatedly, or if you smell gas at any point, stop and call a technician.
Follow these relighting steps exactly — each is one clear action:
After relighting, watch the pilot for a few minutes — check flame color and steadiness. If it won’t remain lit or behaves oddly, that’s a good reason to bring in an expert.
Safety first: never relight if you smell gas or if a CO alarm has sounded. Evacuate and call emergency services or your gas utility in those cases. Otherwise, confirm CO detectors are working, ventilate the area, and have a flashlight, a long‑reach lighter or the manufacturer’s igniter, and the furnace manual on hand. Keep kids and pets away and avoid repeated attempts that could hide a deeper fault. Don’t use open flames if you suspect a leak — and when in doubt, call a pro.
These precautions keep the relighting process safe and controlled.
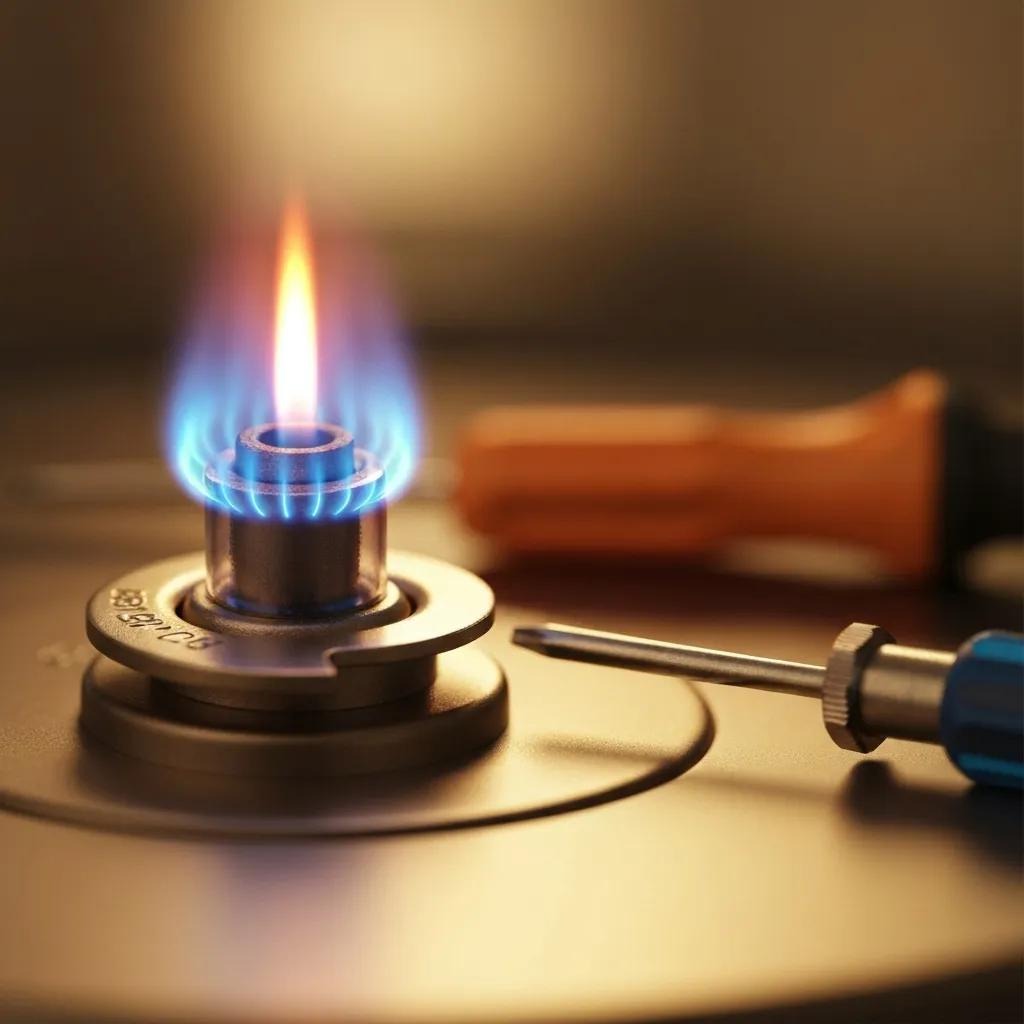
Use the manufacturer’s sequence: shut off the gas, wait five minutes, switch to PILOT, hold the pilot button, ignite, hold for 30–60 seconds, then release and switch to ON. Make sure the pilot is a steady blue flame that surrounds the thermocouple tip — that shows correct positioning and heat transfer. If the flame looks weak or yellow, don’t run the furnace; ventilate the area and call for inspection. Note what you see during relighting — flame color, whether it stayed lit after you released the control, and any unusual noises — so you can give accurate details to a technician if needed.
Those observations help decide whether a simple cleaning fixed the issue or if professional attention is needed.
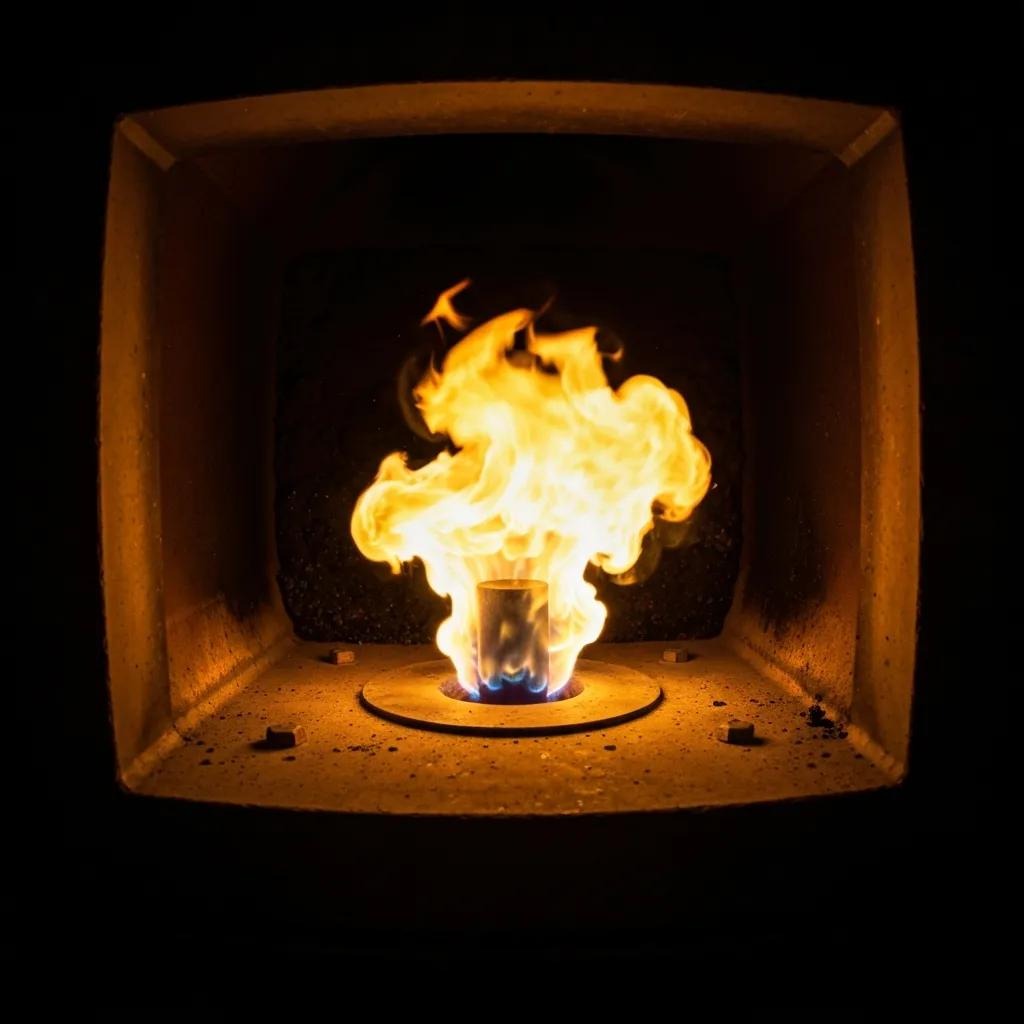
A healthy pilot burns steady and blue. A yellow, orange, or flickering pilot usually points to incomplete combustion caused by soot, poor airflow, or debris in the orifice — and it’s a safety and efficiency concern. Incomplete combustion reduces heating efficiency and creates soot that soils components; persistent yellow flames can also indicate conditions that raise the risk of carbon monoxide. Treat sustained yellow or flickering flames as a red flag: ventilate the area, shut down the appliance if it feels unsafe, and call a qualified technician for combustion testing and burner cleaning. Fixing yellow flames quickly protects equipment and occupants.
Below is a quick guide to common flame behaviors:
If a yellow flame persists after brief, safe adjustments, schedule a professional combustion test.
Incomplete combustion happens when there’s not enough oxygen or when contaminants enter the combustion stream. That shifts a blue flame toward yellow or orange and produces soot and carbon monoxide. Dust, spider webs, or partially blocked burners change airflow and fuel mixing, lowering flame temperature and causing yellow tips or soot near the pilot. That soot can hide or damage sensors like the thermocouple and start a chain reaction of failures. If occupants feel unwell or a CO alarm sounds, ventilate and shut down the furnace before any inspection or cleaning.
Knowing the basics of combustion explains why flame color is a useful early safety signal and when to act fast.
A yellow pilot becomes a CO concern when it’s paired with a CO alarm, occupant symptoms (headache, nausea, dizziness), or visible soot and staining around the furnace. In those cases, evacuate, ventilate if safe, and contact emergency services or a licensed HVAC pro for urgent testing. Even without symptoms, a recurring yellow flame should trigger a combustion analysis to measure CO and correct burner settings or venting. Addressing the root cause prevents chronic exposure and equipment damage from soot buildup.
Professional testing and correction restore safe, efficient operation.
Call a professional when you see warning signs of unsafe operation, repeated failures, or issues beyond basic homeowner checks. Technicians diagnose gas valve problems, replace thermocouples, and run carbon monoxide tests. Call immediately for any gas odor, CO alarm activation, persistent yellow or sooty flames, repeated pilot outages after correct relighting, or electrical/gas‑valve faults. In Phoenix and Sun City, seasonal dust and monsoon debris can worsen pilot instability — prompt professional response reduces risk and downtime.
Use the checklist below when deciding to schedule service and to describe symptoms clearly when you call. For heating services, consider heater repair in phoenix.
Key warning signs that need expert furnace repair:
Those conditions typically require trained diagnostics and component repair or replacement.
Warning signs that merit expert repair include gas odor, CO alarm triggers, recurring yellow flame, repeated pilot outages, visible soot, and failures that occur when the thermostat calls for heat. These indicate problems that go beyond safe homeowner fixes. A technician will prioritize safety — isolating leaks and measuring CO — then run component tests like thermocouple millivolt checks, gas‑valve electrical tests, and pilot orifice inspection. Timely professional repair reduces health risks and prevents minor faults from turning into major failures. Document what you saw and any actions you took to speed the technician’s diagnosis.
When you see these signals, schedule service rather than continuing DIY attempts.
Pinon Air Heating and Cooling serves Phoenix and Sun City with furnace repair and maintenance focused on safety, reliability, and clear pricing. Our technicians diagnose pilot and thermocouple problems, repair or replace pilot assemblies, test gas valves, and run combustion/CO analyses when needed. When you schedule service, expect a step‑by‑step approach: safety checks, pilot and thermocouple inspection, gas valve testing, and combustion testing where indicated — followed by transparent repair recommendations and cost explanations. For homeowners who prefer pro care, we provide prompt, local furnace service aimed at restoring safe, efficient heating.
When relighting fails or safety concerns appear, professional service is the practical and safest choice.
Regular maintenance catches early signs of thermocouple wear, pilot orifice clogging, and burner or venting problems before they cause outages or safety issues. Inspections and cleanings remove dust, debris, and spider webs that can block the pilot tube; thermocouple checks confirm proper alignment and sensing voltage. Routine combustion analysis and burner adjustment keep flame color and combustion efficiency in the safe zone, cutting soot and CO risk. Sticking to a maintenance schedule reduces emergency repairs, extends component life, and keeps heating steady through Phoenix’s seasonal cycles.
The table below outlines common maintenance tasks, what they involve, and how often they should be done.
Regular tune‑ups like these lower the chance of pilot instability and improve overall safety and efficiency.
An annual tune‑up aimed at pilot care usually includes cleaning the pilot orifice and tube, inspecting and testing the thermocouple, cleaning burners and the combustion chamber, and running a combustion analysis (including CO measurement) when needed. Technicians align the thermocouple tip in the flame, remove soot or debris that can block gas flow, and confirm the pilot is a steady blue with proper coverage of the thermocouple. These steps prevent outages, keep burners efficient, and reduce wear on ignition components. A documented tune‑up creates a service history that speeds future diagnostics.
Pinon Air Heating and Cooling offers tune‑up plans that focus on these inspections and tests so you catch pilot issues early and avoid emergency repairs.
Regular cleanings remove dust, insect debris, and soot that destabilize the pilot flame and impair thermocouple sensing — which helps the pilot last longer and cuts down on nuisance outages. Cleaning restores correct airflow and fuel mixing at the pilot and burners, supporting a stable blue flame and reducing incomplete combustion and CO risk. Routine cleaning lessens the workload on safety components like thermocouples and gas valves, extending their service life and lowering the chance of mid‑season failures. Homeowners who combine cleaning with annual combustion checks generally see fewer emergency repairs and steadier furnace performance.
That’s why scheduled maintenance is usually the most cost‑effective way to avoid pilot‑related downtime.
Thermocouple replacement is a common repair. Whether to replace or try other fixes depends on the failure mode, parts availability, and whether nearby components (pilot orifice, gas valve) need attention. The repair process is straightforward: the technician shuts off gas, removes the old thermocouple, installs and aligns the new one, then tests pilot operation and runs safety checks — including combustion and CO testing if indicated. Cost factors include part choice (OEM vs. universal), labor time (how easy the furnace is to access), any additional repairs found, and emergency or travel fees for fast service. Local market conditions in Phoenix and Sun City, and seasonal demand, can also affect pricing and scheduling.
The table below compares common repair options and when to choose them.
This comparison helps homeowners and technicians decide whether a thermocouple replacement alone will fix the issue or if broader repairs are needed.
When replacing a thermocouple, the technician first isolates gas and power, removes access panels, takes out the failed thermocouple, installs the correct replacement, positions the tip so it sits fully in the pilot flame, then restores gas and tests for proper operation and safe shutdown behavior. After replacement, they confirm the pilot stays lit once you release the control, verify the main burners ignite when the thermostat calls, and perform a basic combustion or CO check if needed. A reputable technician documents the work, explains any additional findings, and recommends preventive steps to avoid repeat problems.
Those steps ensure a safe, effective repair and clear service reporting.
Local cost factors include technician labor rates, choice of OEM versus universal parts, complexity of furnace access, emergency or weekend service surcharges, and seasonal demand that affects availability. Phoenix‑specific conditions — like heavy dust seasons — can increase the need for fast service. Homeowners should expect some variability in total cost; good technicians will present options and transparent pricing before they begin. Pinon Air Heating and Cooling provides professional thermocouple replacement and clear explanations about parts and labor so you can make an informed decision that balances safety and budget.
Understanding these local influences helps you anticipate pricing and prioritize safety when scheduling repairs.
Knowing how to spot and safely troubleshoot pilot light issues keeps your home warmer and safer. Identifying common problems — from thermocouple failures to supply interruptions — lets you take practical steps or call a technician when needed. Regular maintenance and timely professional repairs extend equipment life and reduce risks. If you need help, reach out to a licensed HVAC professional to restore safe, dependable heating.